This is R.C.'s page!
Height maps in top-down pixel art
For the 'engine' i developed for my game, i am using heightmaps on my pixel art to achieve various cool effects like dynamic water height, overlapping geometry, decals, 3D lighting and even the scene's z-sorting.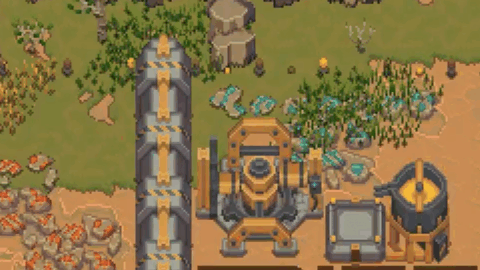
 I use materials made of two textures: a diffuse map and what i call an effect map.
Each color channel of the effect map is used to store different additional information,
where the red channel is used for the height map, the green channel for the emissive map,
blue and alpha channels are currently unused.
I use materials made of two textures: a diffuse map and what i call an effect map.
Each color channel of the effect map is used to store different additional information,
where the red channel is used for the height map, the green channel for the emissive map,
blue and alpha channels are currently unused.
// Getting the value of this pixel in the effect map's red channel
float height = texture(effectMap, TexCoord).r;
// Adding the entitys z position to the base height
height += min(entityPos.z, 127.0) / 127.0;
// Manual depth test:
// if an already rendered pixel at this position has a greater height, discard this pixel
if(gl_FragDepth > 1.0 - height)
discard;
// Manually writing the height to the depth buffer
gl_FragDepth = 1.0 - height;
// Also write the height to the effect buffer's red channel
// which will be bound as a texture in the second render pass
FragColor = vec4(heightMapHeight, 0.0, 0.0, 1.0);
In the second render pass, this happens in the fragment shader:
// Again, getting the value of this pixel in the height maps red channel
// and calculating a normalized absolute height
float height = texture(effectMap, TexCoord).r;
height += min(entityPos.z, 127.0) / 127.0;
// Getting the height value of the effect buffer rendered in the first render pass
float effectBufferHeight = texture(effectBuffer, gl_FragCoord.xy / textureSize(effectBuffer, 0)).r;
// If the effect buffer's height is greater than the height of this pixel,
// this pixel is obstructed by a pixel of another sprite and should not get rendered
if(effectBufferHeight > height)
discard;
I am not a professional graphics programmer and you should not take this as the optimal solution.
I think doing this in 2 renderpasses may sound expensive or unnecessary,
but since both fragment shaders can exit very early before any expensive calculations for
lights/outlines/water/ambient occlusion (yes, my 2D engine has ambient occlusion!) are made, this seemed like a good approach.
Z-Sorting
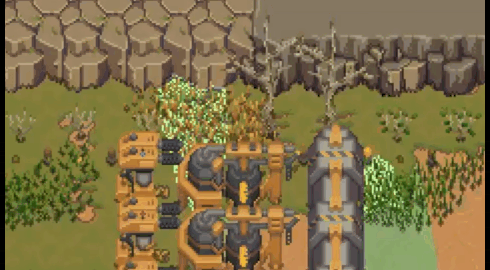
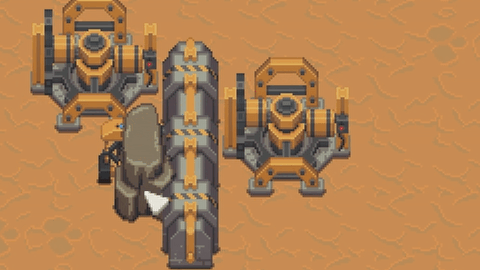
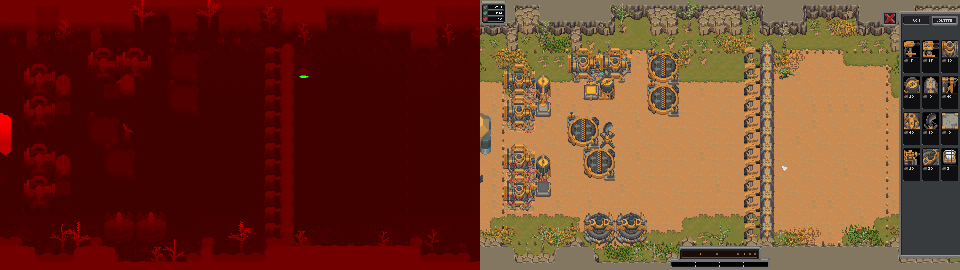
Usually in 2D games, it is needed to sort all sprites by their y coordinate and to draw everything from back to front, which is now obsolete having the depth buffer rendered. Just those few lines of code (and hundreds of hours of pixeling height maps :)) do the whole z-sorting in the game. The quads can be at any z-coordinate and can be drawn in any order. Actually to reduce overdraw sprites should be drawn from front to back in this case. But this is much more powerful than regular z-sorting. Imagine this: A character can move and be behind a wall or in front of it. The y-coordinate of this character determines wheter it should be drawn before or after the wall gets drawn. But in other games there can never be anything inbetween, there can never be a part of the character drawn in front of the wall, while other parts are obstructed by the wall. In my engine, this decision is made per pixel and not per sprite. Objects can overlap each other almost as if they were 3D-models or voxels.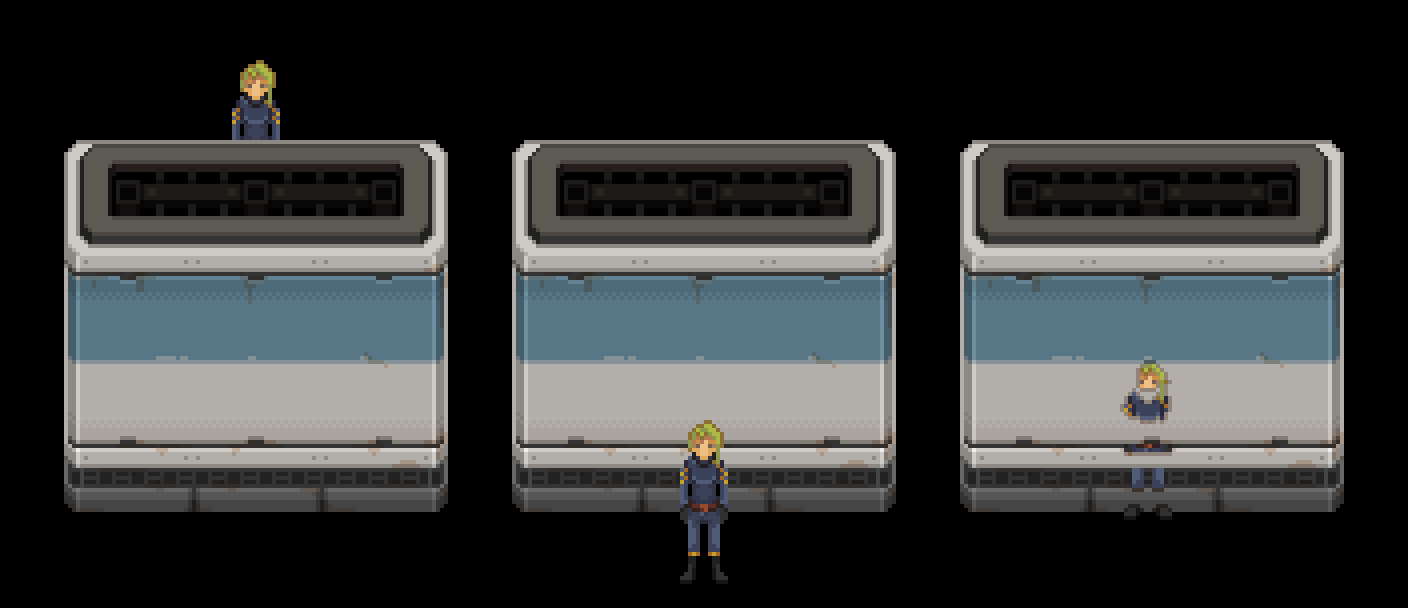
'Ambient occlusion'
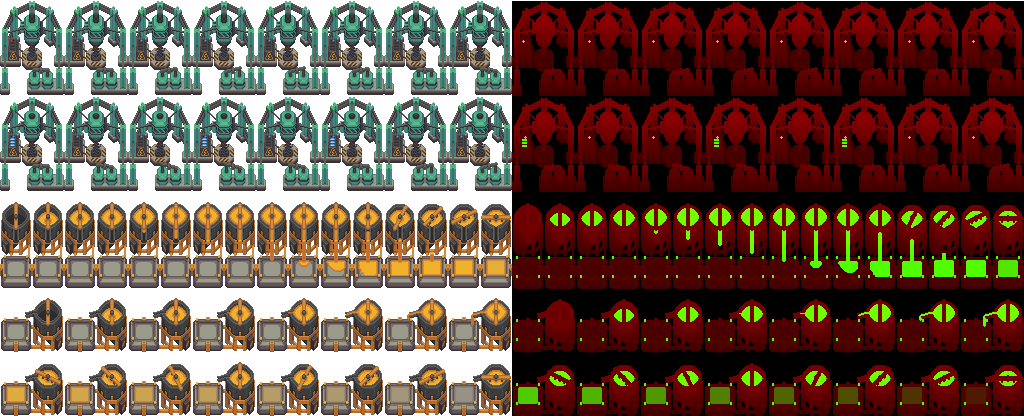
Since the edges where sprites overlap did look pretty bad, i implemented an ambient occlusion like effect. For this, the shader just checks if the neighbouring pixels in the effect map have the value the sprite expected there to be by looking at the pixels at those positions in its own height map. If they dont match, darken the color there.
Creating the heightmaps
The height maps need to be manually painted, however i did some small aseprite scripts to speed up the process. Using 8-bit per pixel PNGs means 2^8 = 256 different height values can be stored. The problem here is, that it is almost impossible to distinguish values with the naked eye. I created a gradient with 256 values and tinted the values in a pattern of green, yellow, red, magenta, blue and cyan columns. This reduced the problem to distinguishing values with the same hue, which is still challenging since the brightness difference of neighbouring values of the same hue is hardly noticable. So i decided to use the smaller 128 values gradient as the color palette i will use for pixeling heightmaps. Having only 128 height values means an entity can only be 128 pixels high, which is more than enough for my game, and higher objects can just be made of multiple entities if needed.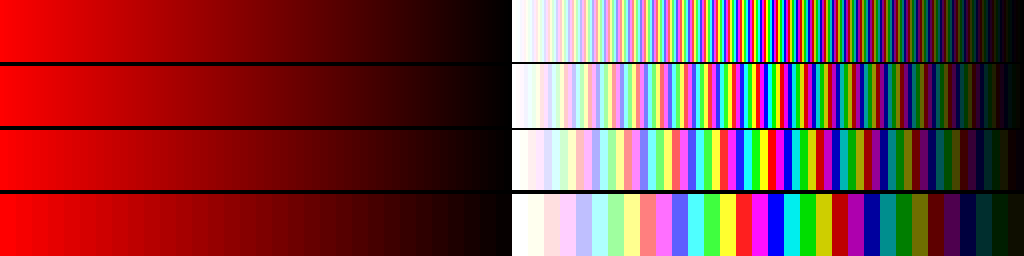
Still not convinced?
I took advantage of this rendering wherever i could in my game, for example for the animation of buildings raising from the ground: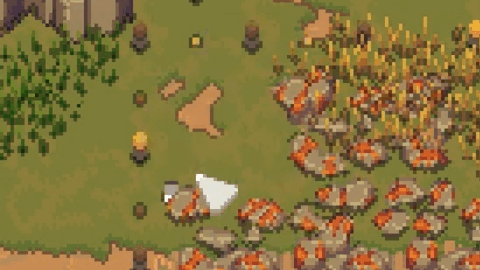
- have light sources exist at 3D positions and calculate the distance between a pixel and a light source with all three dimensions considered
- character’s feet hidden behind tall grass or snow
- put armor/clothing/gear on a character without having to bother which pixels are in front/behind the character's sprite
- real volume based fog
- decals using 3D textures
- …
